 Sign in
RDP for Mac: Run a Windows Server From Your Mac
If you work on a Mac but need Windows for one or two things, RDP for Mac is the cleanest answer: rent a Windows server, open Microsoft's Windows App on macOS, and use a full Windows desktop in a window with nothing installed on your Mac beyond the client. This guide covers why a rented Windows RDP server usually beats dual boot or a local virtual machine, how to connect from macOS step by step, and how to choose a plan and a location.
Why Mac users still end up needing Windows
Most Mac users are perfectly happy on macOS until one specific application refuses to run. The list is familiar: trading platforms whose official builds are Windows only, accounting and payroll tools that never received a Mac version, browser automation suites and scrapers built around Windows components, legacy business software that a supplier stopped updating years ago, and bots or schedulers that must keep running while the laptop is closed.
Each of these creates the same problem. You either keep an old Windows PC on the desk, fight with compatibility layers, or carve out space on the Mac for a Windows install. All three put the burden on your own hardware, and none solves the biggest issue: the Mac sleeps, drops off Wi-Fi or is shut down for the night, and the Windows task stops with it.
A rented RDP server removes that dependency. Windows runs on a machine in a data centre, your Mac becomes a screen and keyboard for it, and the work carries on whether the Mac is awake, asleep or in a bag. See what you can run on an RDP or VPS server for a longer list of workloads that suit this setup.
Dual boot, local VM or a rented RDP server for Mac
There are three practical ways to put Windows on a Mac desk. Dual boot means installing Windows beside macOS and rebooting to switch between them. On Intel Macs this was Boot Camp; on Apple silicon Macs it is not supported, which rules it out for most machines sold in the last few years. Even where it works, you lose macOS entirely while Windows is running, and any Windows task stops the moment you need your Mac back.
A local virtual machine runs Windows inside macOS. It is convenient for short sessions, but Windows and macOS now share the same memory, processor, battery and disk. On Apple silicon the VM runs the Arm build of Windows, so older Windows-only software, some drivers and certain trading plugins may not run at all. The VM also stops when the Mac sleeps, so it is a poor home for anything that must stay up.
A rented RDP server for macOS users sidesteps both problems. The server runs a standard desktop build of Windows Server on real x86 hardware, it stays on when you disconnect, and it uses none of your Mac's resources. You also get a dedicated IPv4 address and full administrator rights, which matter for anything that needs a fixed IP or deep system changes. The trade-off is that you need an internet connection to use it, and it is a recurring cost rather than a one-off install.
- Dual boot: Intel Macs only, no macOS while Windows runs, everything stops when you reboot.
- Local VM: runs beside macOS but shares its memory and battery, Arm Windows on Apple silicon, stops when the Mac sleeps.
- Rented RDP server: standard Windows Server on x86 hardware, runs around the clock, dedicated IPv4, full admin, needs a connection, billed monthly, half-yearly or yearly.
How to set up RDP for Mac: connecting from macOS
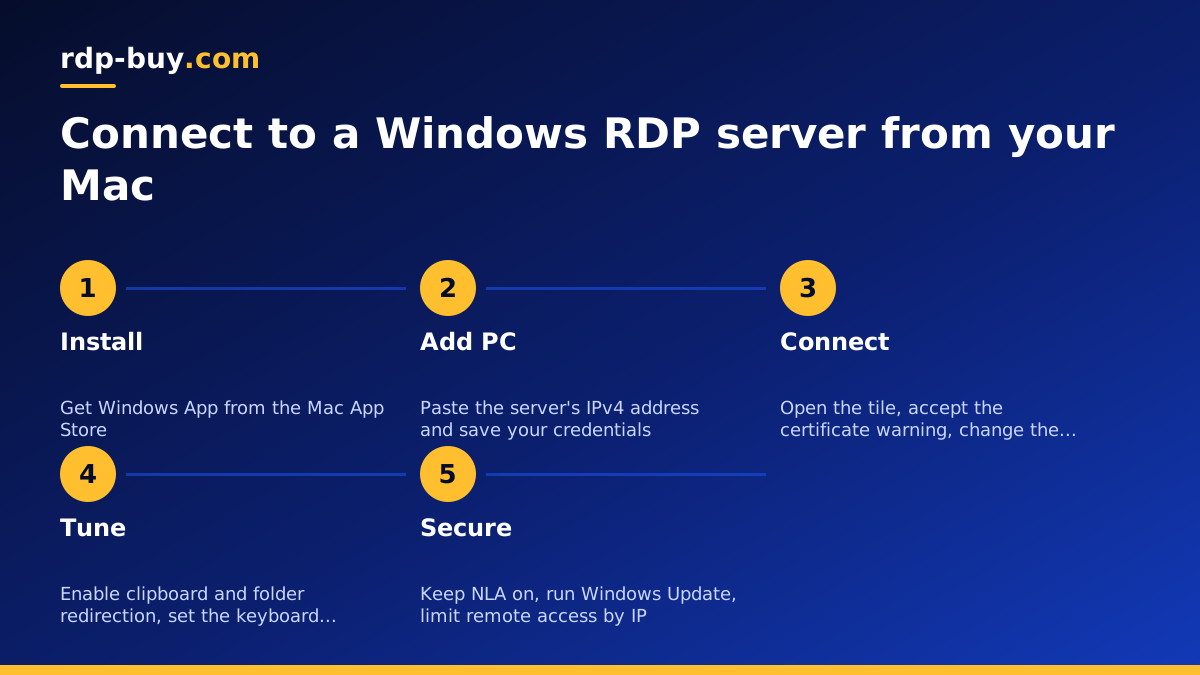
Microsoft's official client for macOS is called Windows App. It replaced the older Microsoft Remote Desktop app, is a free download from the Mac App Store, and runs on both Intel and Apple silicon Macs. Once you have the server details from your welcome email (IP address, username and password), setup takes a couple of minutes. The general guide on how to connect to your RDP server covers Windows and mobile clients as well; the steps below are specific to the Mac.
If the first connection fails, check three things in order: that you typed the IP without spaces, that your Mac is actually online, and that the server has finished its first boot. New servers are ready in minutes, but a connection attempted too early simply times out. If it still will not connect, support is available 24/7 and can check the server from their side.
- Install Windows App from the Mac App Store and open it.
- Click the plus button in the toolbar and choose Add PC.
- In the PC name field, paste the server's IPv4 address exactly as it appears in your welcome email.
- Under Credentials, choose Add credentials and enter the username (usually Administrator) and the password you were sent. Saving them here means you are not asked every time.
- Give the connection a friendly name such as Trading server or Accounts, then click Add.
- Double-click the new tile. The first time, the app warns that the server's certificate cannot be verified; this is normal for a fresh server, so click Continue.
- You are now on the Windows desktop. Change the Administrator password straight away in Windows settings before you do anything else.
Display, clipboard, folders and keyboard on a Mac
Windows App has a settings pane for each saved PC, and a few options make daily use much more pleasant. Under Display you can let the session use all your monitors, start full screen, or fit the window to the screen. On a Retina display, leave the resolution on its default and tick the option to optimise for Retina so text stays sharp rather than tiny. If the session feels sluggish on a weak connection, lowering the colour quality helps more than anything else.
Under Devices and Audio, turn on clipboard redirection so you can copy text on the Mac and paste it into Windows, and the other way round. Folder redirection lets you pick Mac folders that appear inside Windows as drives, which is the easiest way to move spreadsheets, indicator files or installers onto the server without a cloud service in between.
Keyboard differences trip up most people in the first week. Windows expects Ctrl for shortcuts, and the Mac keyboard puts Cmd in that position. By default Windows App sends Cmd as the Windows key and Ctrl as Ctrl, so Ctrl+C and Ctrl+V work in the session while Cmd+C does nothing useful. If you would rather Cmd behaved as Ctrl inside Windows, there is a keyboard option for exactly that. Option is Alt, a two-finger scroll acts as a mouse wheel, and a two-finger click or Ctrl-click gives you a right-click.
- Display: full screen or windowed, all monitors, Retina optimisation, colour quality.
- Clipboard: two-way copy and paste for text and small files.
- Folders: redirect a Mac folder so it appears as a drive inside Windows.
- Keyboard: Cmd is the Windows key by default, Option is Alt, Ctrl is Ctrl; change the mapping if you want Cmd to behave as Ctrl.
Choosing a plan and a location for Windows RDP on Mac
Plan size depends on what the Windows side has to do, not on your Mac. A single accounting package or one trading platform with a few charts is light work, and a small plan is enough. Several browser profiles, automation suites that drive a real browser, or a platform with many indicators and regular backtesting need more memory and processor time, so a mid-sized plan avoids stutter. If you intend to leave bots running day and night, allow headroom rather than sizing for the quiet moments. The guide on which RDP plan do you need walks through the sizing questions in more detail.
Location matters more than most Mac users expect, because the server, not your Mac, is the thing talking to your broker, your bank portal, your APIs or your customers. Pick a location near those services rather than near your desk: the remote desktop protocol copes well with distance, while a trading or automation connection does not. If you use a US broker from Europe, a US server is the right call; if you serve Indian customers, choose India. rdp-buy.com offers 33 server locations, listed with guidance on the RDP server locations page, and there are dedicated forex RDP plans for the most common trading case.
Keeping your RDP server for macOS secure
A Windows server with a public IPv4 address will see password guessing attempts soon after it goes live. Three habits deal with almost all of it. First, set a long, unique password for the Administrator account, or create a new admin user with a different name and disable the default one. Second, keep Network Level Authentication enabled, which it is by default on Windows Server; it forces the client to authenticate before a desktop session is created, so most automated attacks are stopped at the door. Third, let Windows Update run and reboot on a schedule that suits your workload, for example early on a Sunday morning.
Beyond that, use Windows Firewall to restrict the remote desktop port to your own IP range if you connect from fixed locations, keep the number of users on the server small, and never leave passwords in plain text files on the desktop. If you run bots or trading software with account logins, give them their own Windows user with no admin rights so that a compromised script cannot change the system.
- Change the default password at first login and keep it long and unique.
- Leave Network Level Authentication switched on.
- Install Windows updates and reboot on a schedule you choose.
- Limit remote desktop access by IP in Windows Firewall where you can.
- Run bots and platforms under a standard user, not Administrator.
What a Windows RDP server from rdp-buy.com includes
Every Windows RDP plan comes with full administrator access, so you can install any Windows application, add users, open ports and run services in the background. You get a dedicated IPv4 address that stays with your server, and the Windows licence is included in the price, so there is nothing extra to buy or activate. Servers are ready in minutes after payment, support is available 24/7, and you can pay by card, PayPal or crypto on monthly, half-yearly or yearly billing. If you also want to run agents from your Mac, Windows RDP for AI agents explains that use case.
If your need turns out to be Linux rather than Windows, for example a Python scraper or a self-hosted tool in Docker, a Linux VPS is the better fit, and the Terminal app already on your Mac connects to it over SSH. The guide on RDP vs VPS explains the difference.
Picking your plan on the buy RDP page
To order, open the Windows RDP plans page and work through three decisions. Start with the location nearest the services your Windows software talks to. Then choose the plan size: small for one desktop application, mid-sized for several applications or any browser automation, larger for backtesting, many bots or several users logging in at once. Finally, pick the billing term; monthly is fine for a trial, while half-yearly or yearly suits a server you already know you will keep.
After checkout, watch for the welcome email, install Windows App on your Mac, add the PC with the IP and credentials, change the password, switch on clipboard and folder redirection, and you have a Windows desktop that never sleeps when your Mac does.